NOTE: Before attempting to Restore or Export data, review the DigiScope Options Configuration Dialog to ensure that the options for the desired results are set.
NOTE: If your administrative
policy does not allow the creation of Personal Folder (PST) files, you
will not be able to use DigiScope to create Personal Folder (PST) files.
For more information see:
http://support.microsoft.com/kb/896515
http://support.microsoft.com/kb/867807
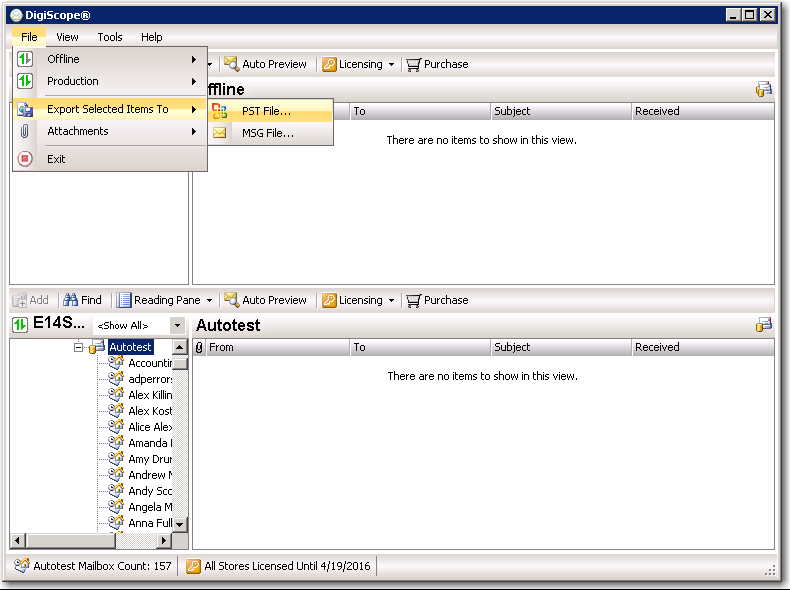
After Adding and Mounting the desired Offline source or Adding and Connecting to the desired Production source, navigate to and select the desired mailbox, folder, or items to be exported to Personal Folder (PST) File. Then, click the File > Export Selected Items to > PST File... menu option.
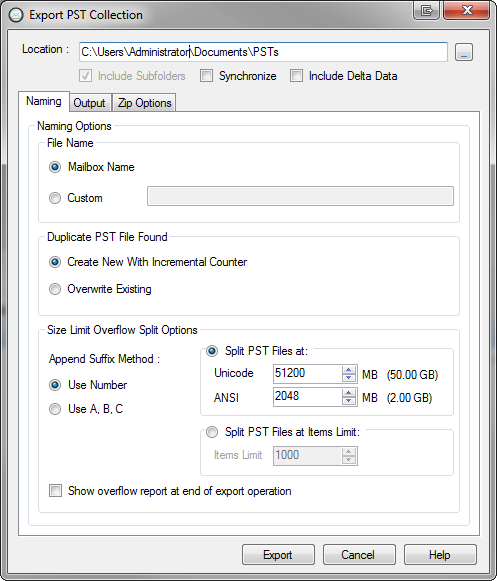
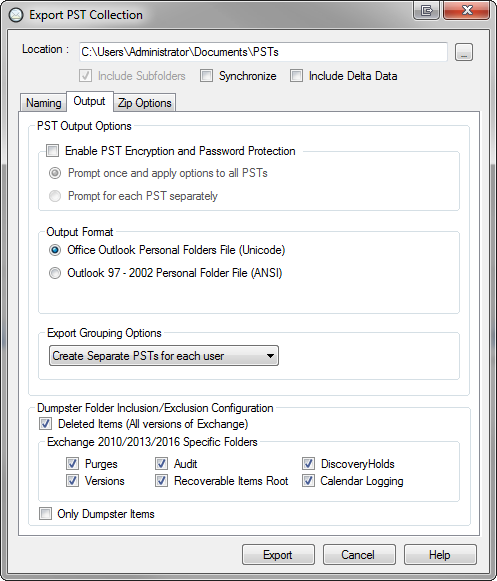
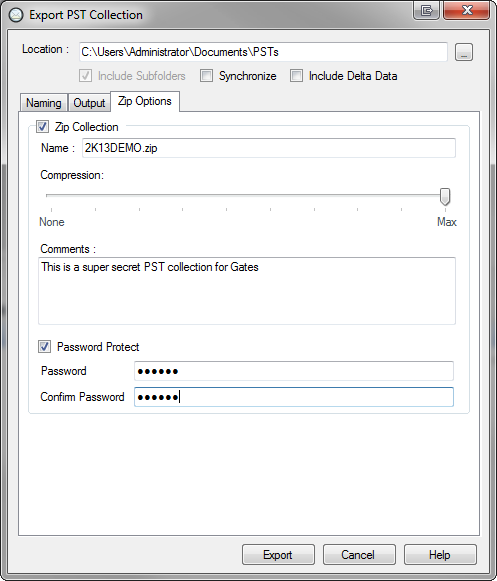
Next, the Export PST Collection dialog is displayed. The Export PST Collection dialog provides you with many different options to customize your exported Personal Folder (PST) files. Once you have selected the desired options for your Personal Folder (PST) file export, click the Export button to start the Export process.
NOTE: Click any area in the images below for a functionality description of that area.
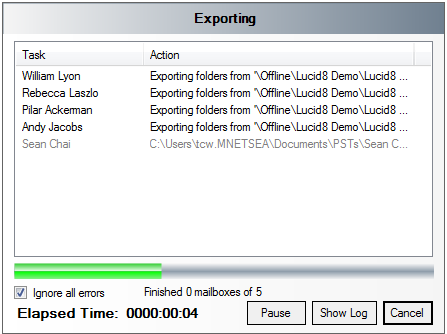
Next, the following dialog is shown where you can follow the progress while DigiScope performs the export.
(Optional) Click Pause to temporarily suspend the export operation. (This can useful if, for example, the operation is causing an unexpected burden on the target Exchange server and you would like to finish the operation during office downtime.) When you are ready for the export operation to complete, click the Continue button.
Return to Exporting Selected Items
Continue to Exporting Selected Items to Message (MSG) File
Continue to Exporting Attachments