Adding an Office 365 | Exchange Online Environment
WARNING:
Running Outlook and DigiScope simultaneously may cause connectivity issues.
Adding your Office 365 environment to DigiScope is a multi-step process
that must be followed as outlined below to successfully add and connect
to your Office 365 | Exchange Online environment.
Create
an Office 365 Global Admin Account
.
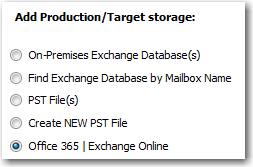
On the first page, select the Office
365 | Exchange Online option, then click the Next
> button to continue.
The Office 365 | Exchange Online file wizard dialog
appears. Enter the full username and password of the DSAdmin365 @<your
domain>.com (or its equivalent)

NOTE: If you have
not already done so you MUST create the DSAdmin365@<your domain>.com
(or its equivalent) by following the instructions
Granting Full Permissions to the DSAdmin365 account
Before authenticating to your Office 365 environment with DigiScope
the DSAdmin365 account (or its equivalent) must be given permissions for
all mailboxes you want to access. This can be accomplished using one of
3 available methods.
WARNING:
Running Outlook and DigiScope simultaneously may cause connectivity issues.
Method 1: Authenticate and Grant Permissions
to ALL Office 365 | Exchange Online Mailboxes via DigiScope
This is the easiest method to add permissions to ALL
Mailboxes within your office 365 environment, however it can take
some time to accomplish because of Microsoft throttling as well as latency
between your physical location and the office 365 environment. Be patient
when using this method, it can be downright glacial at times for the reasons
mentioned above. We also have to enumerate through each account one at
a time to complete the process, i.e. the more mailboxes you have the longer
it will take to complete.
The good news is that once permission granting process is completed
you won't have to do it again unless you add new mailboxes to your office
365 environment. If new mailboxes are added in the future you can rerun
this process or use one of the alternate processes below to grant permissions
only for the new mailboxes.
NOTE: If you don't
want to grant access to ALL Mailboxes, need to add rights for just a few
mailboxes OR have a large number of mailboxes then use one of the alternate
permission granting methods below
If you have not already done so enter the full username
and password of the DSAdmin365 @<your domain>.com (or its equivalent)
Select the "Grant
Full Permission to ALL mailboxes" option
Click the Authenticate
and Grant Permissions button and wait while DigiScope attempts
to log on with the given account details.
If the logon attempt fails, a red exclamation
point icon will appear next to the "Authentication
& Grant Permissions" button. Hover over the icon
to see the actual error code as shown below.

If the logon is successful, the dialog will show
a "Success" response as shown below.

Once you have successfully authenticated, click Next > button at the bottom of
the dialog and proceed to the "Finish Adding Office
365 Environment" section below.
NOTE: If in the
future you add more mailboxes to your Office 365 environment you will
need to use Method 2 or 3 so that the DSAdmin365@yourdomain.com is granted
rights to the new mailboxes
Method
2: Grant Permissions to All Office 365 | Exchange Online Mailboxes via
PowerShell
WARNING:
Running Outlook and DigiScope simultaneously may cause connectivity issues.
This method allows you to use PowerShell commands to grant the DSAdmin365
or equivalent account permissions to ALL mailboxes within your office
365 environment, however it does require additional setup and actions
via PowerShell.
Just like Method 1 it can take some time to accomplish because of Microsoft
throttling as well as latency between your physical location and the office
365 environment and the more mailboxes you have the longer it will take
to complete, however this method displays results real time in the PowerShell
CLI so you have a better idea of how the process is progressing
Follow the detailed instructions on "Granting
Permissions via PowerShell to All Office 365 | Exchange Online Mailboxes"
If you have not already done so enter the full username
and password of the DSAdmin365 @<your domain>.com (or its equivalent)
and DO NOT Select the "Grant
Full Permission to ALL mailboxes" option.
- Click the "Authenticate"
button
- If the logon attempt
fails, a red exclamation point icon will appear next to the Authentication
. Hover over the icon to see the actual error code as shown below.

If the logon
is successful, the dialog will show a "Success" response
as shown below.

Once you have successfully authenticated, click Next > button at the bottom of
the dialog and proceed to the "Finish Adding Office
365 Environment" section below.
Method
3: Manually Granting Access Permissions to Specific vs All Office 365
Mailboxes
If you would prefer to use DigiScope to access only
specific vs all mailboxes
follow the detailed instructions on Manually
Granting Access Permissions to Specific vs All Office 365 Mailboxes.
If you have not already done so enter the full username
and password of the DSAdmin365 @<your domain>.com (or its equivalent)
and DO NOT Select the "Grant
Full Permission to ALL mailboxes" option.
- Click the "Authenticate"
button
- If the logon attempt
fails, a red exclamation point icon will appear next to the Authentication
. Hover over the icon to see the actual error code as shown below.
If the logon
is successful, the dialog will show a "Success" response
as shown below.
Once you have successfully authenticated, click Next > button at the bottom of
the dialog and proceed to the "Finish Adding Office
365 Environment" section below.
Finish
Adding Office 365 environment
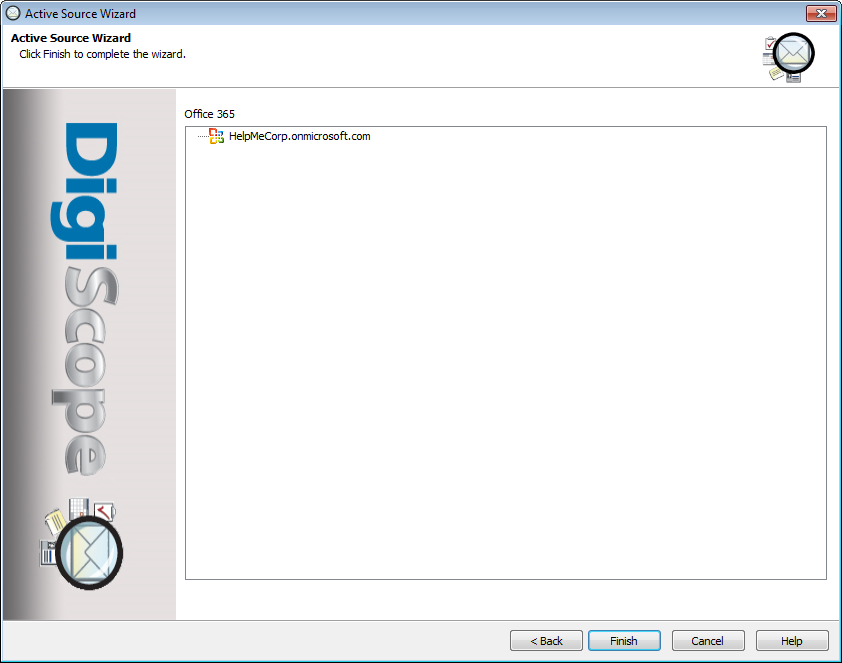
After successful authentication and clicking Next
> the listing for your Office 365 environment will appear in
the dialog like the one shown below. Click Finish
to complete adding the environment to the DigiScope Production tree.
NOTE: If in the
future you add more mailboxes to your Office 365 environment you will
need to use Method 2 or 3 so that the DSAdmin365@yourdomain.com is granted
rights to the new mailboxes
Continue to Connecting
to your Office 365 | Exchange Online Environment