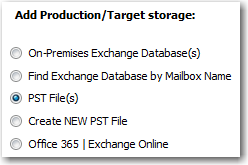
Check the PST File(s) option, then click the Next > button to continue.
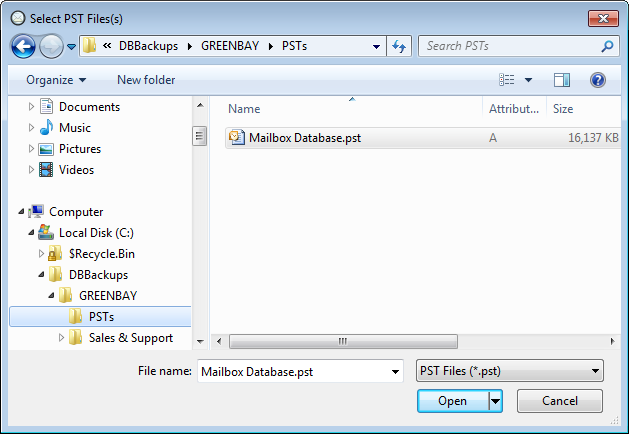
Next, you will be prompted to select Personal Folder (PST) files you wish to add to the Production Tree. Navigate to the location of the desired Personal Folder (PST) files and select the PST file to continue.
If the Missing Outlook DLLs page is displayed, click here for more information.
You have reached the end of the File Wizard. Enter the name of the group in the Production Tree you want the Personal Folder (PST) files to be added under. You should see the Personal Folder (PST) files that will be added to the Production Tree listed. If you wish to add more Personal Folder (PST) files, click the Add button and you will be prompted to select the Personal Folder (PST) files you would like to add. If you wish to have the Personal Folder (PST) files opened when the File Wizard ends, check the Open PST files box. Click the Finish button to end the File Wizard.
