How to create mapped drives for use with GOexchange®
Mapped drives allow GOexchange to access remote directories for use as GOexchange Work Area directories and other related tasks. They should only be needed if the local system does not have sufficient free disk space for these directories.
To set up Mapped Drives:
-
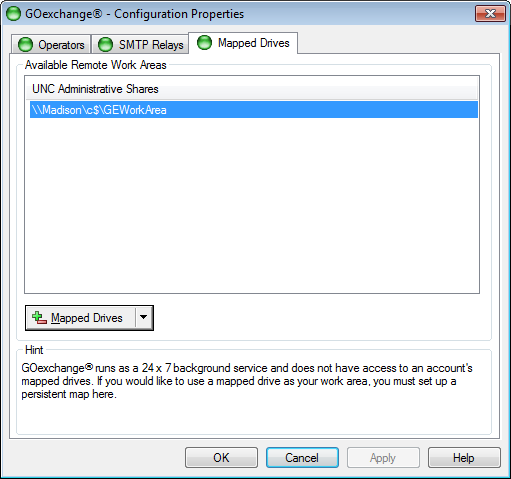
Access the GOexchange® Configuration dialog.
-
Select the Mapped Drives tab.
-
From the Mapped Drives drop-down menu, select Add Mapped Drive.
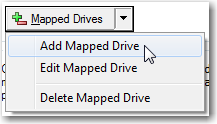
The Browse For Folder dialog appears.
-
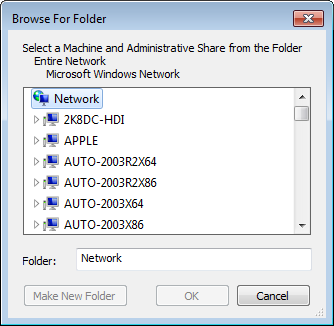
Use the Browse For Folder dialog to select a directory under an Administrative Share on another machine.
What is an Administrative Share?
The Windows operating system automatically creates hidden Administrative Shares for all of its logical drives ("C:", "D:", and so forth) which it names "C$", "D$", and so forth. These shares are intended for remote access by domain administrators.
NOTE: GOexchange will refuse to use any share path that does not include an Administrative Share.
For example:
"\\RemoteMachine\Share\GEWorkArea" will be rejected.
"\\RemoteMachine\S$\GEWorkArea" would be accepted.
To select a directory, either...
-
Open the Entire Network \ Microsoft Windows Network container. (In newer versions of Windows, this will be the Network container.)
-
Expand the domain of the target machine.
-
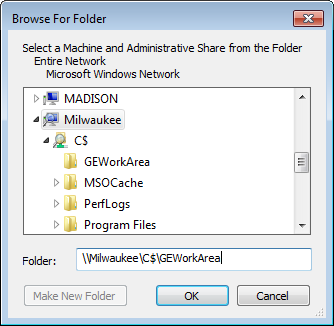
Expand the target machine itself.
-
Expand one of the listed Administrative Shares ("C$", "D$", "E$", etc.).
-
Pick one of the directories under that share or click Make New Folder to create a new one.
... or ...
-
In the Folder text box, type the complete UNC path for an existing target directory, e.g. "\\MachineName\D$\WorkArea".
NOTE: Using either method, it is possible to select just an Administrative Share, e.g. "\\MachineName\C$". This is not recommended.
If you are intending to use this mapped drive as a GOexchange Work Area, we strongly recommend selecting or making a directory under the Administrative Share (e.g. "\\MachineName\C$\WorkArea") in order to keep the temporary files made during a GOexchange job separate from the other files on the system.
-
Once you have selected a directory, click OK to have GOexchange save this as a Mapped Drive.
See also: Work Area Selection
Back to: Configuring a GOexchange Server