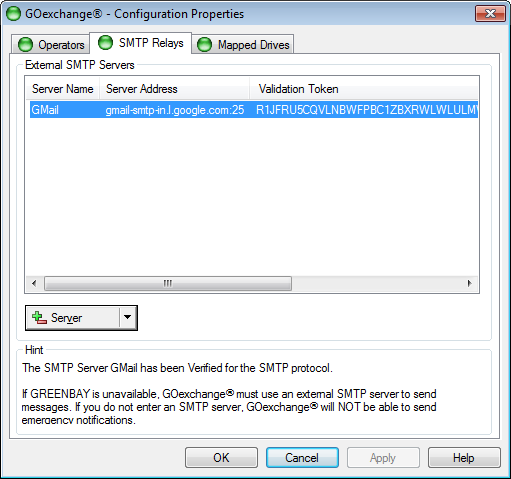
Access the GOexchange® Configuration dialog
Select the SMTP Relays tab.
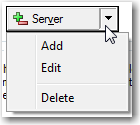
On the Server drop-down menu button, select Add.
The External SMTP Configuration dialog appears.
![]()
Enter a unique name to identify the SMTP server in the Server ID field.
Enter the DNS Fully Qualified Domain Name OR the IP Address of the SMTP server.
Optional: If the SMTP server's connector is on an unusual port, change the Port number from the default "25".
In Server Verification, select one of the Operators' SMTP addresses from the drop-down list, and click Send.
This will send a test e-mail from the indicated account, to that same account, using the specified SMTP server. This will confirm that the server supports relaying for the given account.
Log in to the mailbox of the address selected in the previous step, and open the message with subject:
GOexchange® SMTP Server VERIFICATION "<SMTP_ServerName> - <SMTP_ServerAddress>" for <ExchangeServerName>.
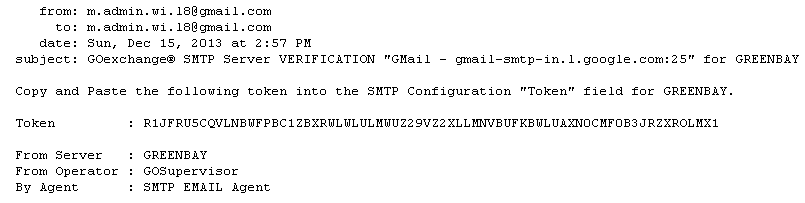
Copy the token string from the message and paste it in the Token field on the External SMTP Configuration window.
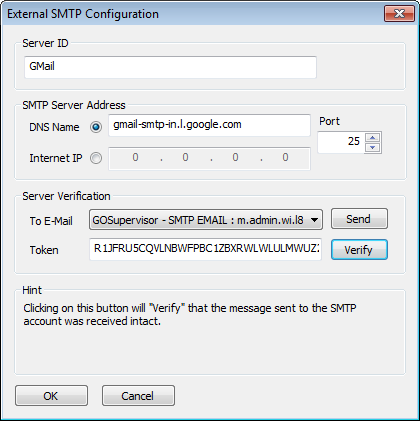
Click Verify. The Verification Success message box appears.
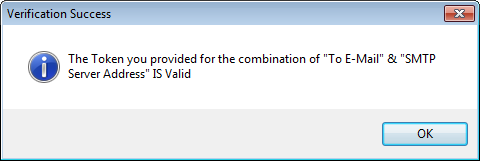
Click OK to close the Verification Success message box.
Click OK to close the External SMTP Configuration dialog.