The EULA dialog appears.
Read the entire agreement. Use the scroll bar to move through the text.
If you agree with the terms of the EULA, click the I accept the terms in the license agreement radio selection.
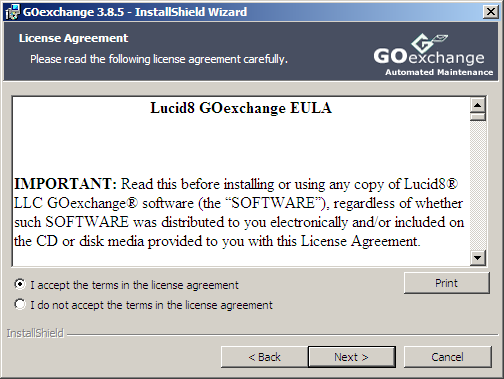
The EULA dialog appears.
Read the entire agreement. Use the scroll bar to move through the text.
If you agree with the terms of the EULA, click the I accept the terms in the license agreement radio selection.
Click Next to continue. The Installation Features dialog appears.
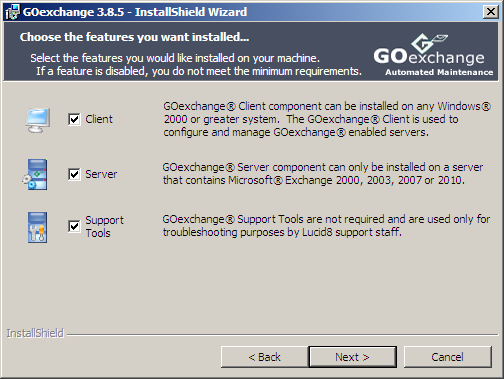
Choose the option for Server and, if desired, select the Client as well.
Support Tools for GOexchange are selected by default, and we recommend that you install these tools since they are small in size and, should you need assistance from a Lucid8 support staff, they will be readily available.
Click Next. The Supply GOSupervisor Password dialog appears.
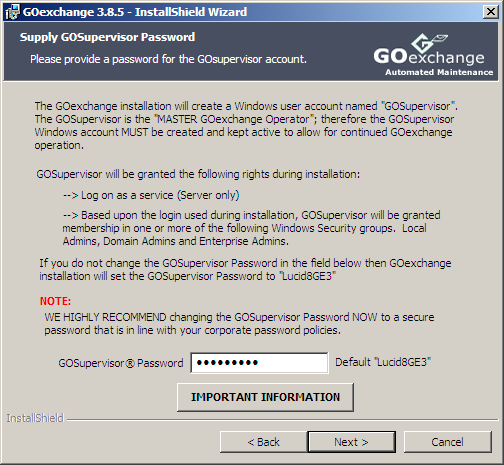
IMPORTANT: By default, the GOSupervisor password will be set to "Lucid8GE3". We highly recommend changing the GOSupervisor password to a secure password that is in line with your corporate password policies.
NOTE: If you are upgrading GOexchange, and in a previous installation you entered a password other than the default, you must supply the correct GOSupervisor password here.
Failing to enter a password here will cause the installer to use the default "Lucid8GE3" password. If that isn't the correct password for the GOSupervisor account, the installation of the GOexchange Server agents will fail!
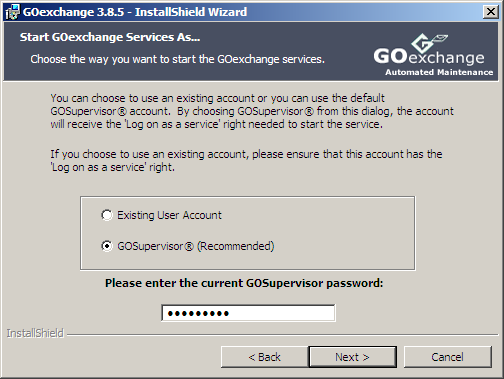
Click Next. The Start GOexchange Services As... dialog appears.
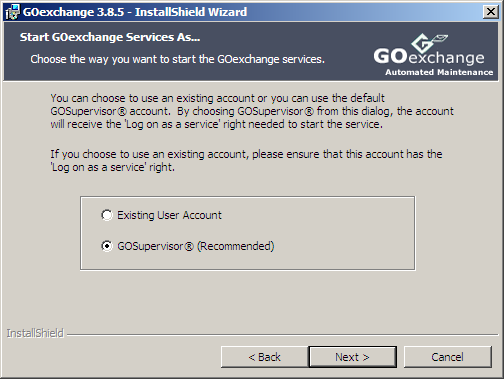
Select Existing User Account or GOSupervisor.
We highly recommend that the "GOSupervisor" account is used. If you choose to utilize an existing account, you must manually ensure that the selected account is:
Granted "Log on as Service" rights.
Granted membership to the highest Microsoft Windows group available of:
Enterprise Admins,
Domain Admins, or
Local Administrators
Granted membership to the highest Microsoft Exchange group available of:
Exchange Enterprise Servers, or
Exchange Domain Servers
Click Next.
If you have previously installed the GOexchange® Server Agent on this server and the GOSupervisor account is still operational, you will be prompted to enter the current GOSupervisor password before continuing.
The Customer Information page appears.
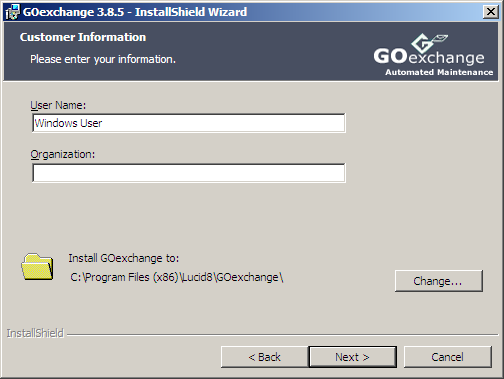
Enter the appropriate User Name and Organization information.
You may change the default folder location where the Wizard installs GOexchange® by clicking the Change button and selecting the desired install drive letter and folder path.
Click Next; the GOexchange Readme dialog appears.
The README contains valuable information about the current release of the GOexchange, including version-specific details not covered in this Help file. Before continuing with the installation, please take a few moments to review this information.
When you have finished reading, click Next.
The Ready to Install page appears.
If you elected to install the "GOexchange® Client", you will be prompted for which shortcuts, if any, you want for the Client Console.
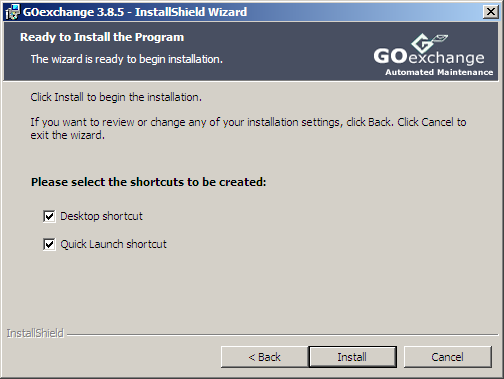
Click Install, and the installation process will begin.
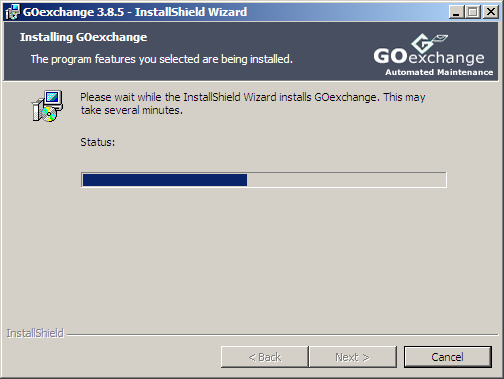
Once the base installation is complete, the GOexchange® Configuration Wizard dialog will appear.
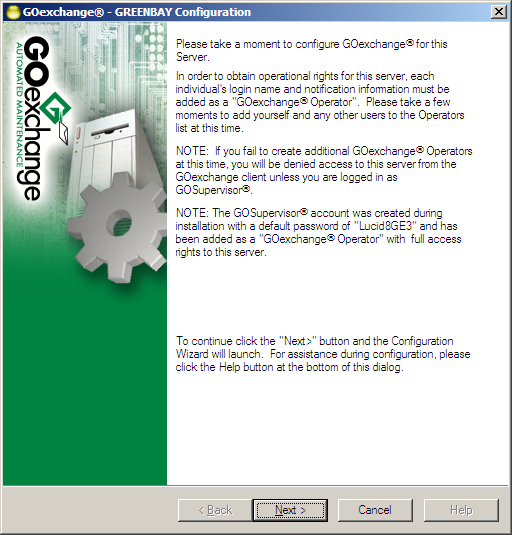
It is extremely important to complete the Server Configuration during the installation. Please proceed to the GOexchange® Server Configuration During Installation section of this help file.
Back to: Server Agents.