Store and Work Area Selection
Store Selection
For most job scripts, you will need specify the Exchange store(s) you wish to maintain.
As most GOexchange scripts involve at least some interruption of service, we recommend only selecting a few stores in each job, to minimize downtime.
One way to arrange this is to create different jobs for each store, and then "stagger" the scheduling of these jobs. For example, you could create separate jobs for "Store A", "Store B", "Store C", and "Store D"; then create a schedule to run the "Store A" job on the 1st Saturday of the month, a schedule to run the "Store B" job on the 2nd Saturday of the month, etc. By the end of the month, maintenance would have been performed on all four stores, but access to each store would have been interrupted for the least amount of time possible. This staggering approach could also be applied to entire Storage Groups, if that would be more convenient.
NOTE: The MTA Error Correction Script does not take action against any particular information store. Therefore, when this script is selected you will not need to select a store.
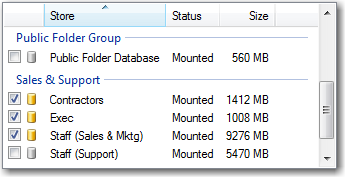
To select a store to act upon:
-
On the Action page of the job specification dialog, check the box next to the icon for each desired store.
-
If the icon turns RED, it means there is a problem with the store selection. Mouse over the icon to see a brief description of the problem.
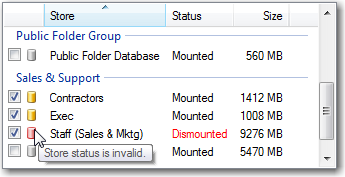
If this problem isn't corrected before the job runs, the job will fail.
Work Area Selection
NOTE: This section only applies to the Preventative Maintenance and Offline Defrag scripts.
GOexchange® requires a Work Area directory for temporary files made during the defrag process. This directory must have free disk space equal to or greater than 110% of the largest store being maintained.
For best performance, we recommend using a directory on a local drive. However, if sufficient space is not available locally, you may use a directory on a previously configured mapped drive.
To change the Work Area selection:
-
On the Action page of the job specification dialog, arrange the window and columns so that you can see the Work Area column of the Store list.

NOTE: The Work Area column will only appear for scripts that need it. If you do not see the column, you do not need to select a Work Area.
-
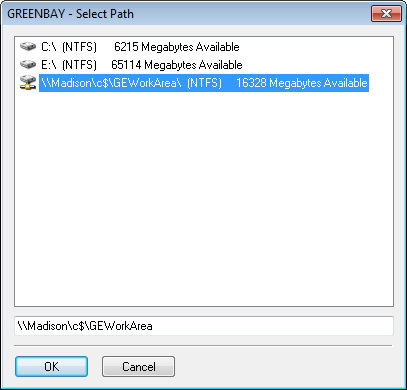
The current Work Area selection will appear as a hyperlink. Click the hyperlink, and the Select Path dialog appears.
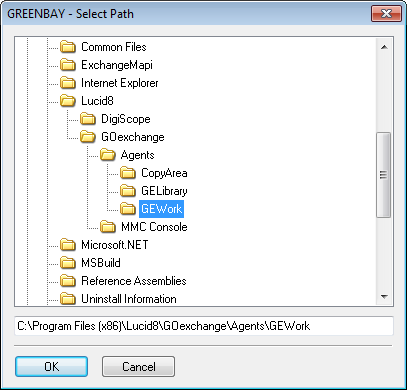
-
Select the drive and directory you want GOexchange® to use for the Work Area.
If you previously created a Mapped Drive, you can select it from this dialog.
-
Click OK.
-
If there is a problem with your selection, the store's icon will turn RED. If this problem isn't corrected before the job runs, the job will fail.

Notice that the Rqd. Space and Avail. Space columns can give guidance on selecting a Work Area. Rqd. Space shows how much free space the Work Area must have. Avail. Space shows how much free space it currently has.
Other problems — like, for example, the directory not being writable — can be diagnosed by mousing over the store's icon and reading the tooltip description.
Proceed to: Error Correction
Back to: Job Specification - Action