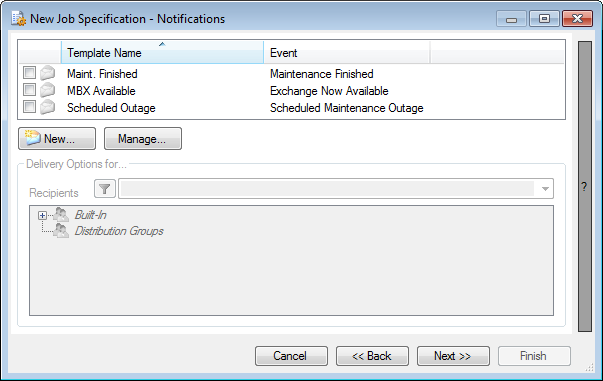
The Notifications page allows you to configure e-mail notifications that will be automatically sent as part of running this job or running a schedule that uses this job.
The page has two major parts: the Template List and the Delivery Options.
The Template List allows you select the Notification Templates that you wish to associate with the job. It also allows you to create a new template or access the Notification Templates window, where more extensive options are available to manage the templates on the server.
The Delivery Options section allows you to control how the highlighted template in the Template List should be used by the job. Here you specify who should receive the e-mail and, for Scheduled Notifications, when it should be sent.
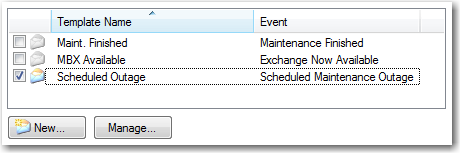
In the Template List, either:
Check an existing template, or...
Click New... and follow these instructions to define a new template.
Leave the template highlighted in the Template List, and turn your attention to the Delivery Options box.
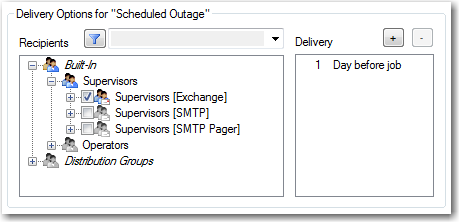
In the Recipients tree, check the individuals or groups that should receive this e-mail. There are three types of targets that may appear here:
Built-In Supervisors/Operators, Individuals: These are the currently known GOexchange Operators, as set up in the server configuration. ("Supervisors" are Operators who have been granted Supervisor Rights.)
Built-In Supervisors/Operators, Groups: These are collections of GOexchange Operators. If you select one of these groups, the notification will be sent to everyone who is a member of that group at the time that the notification is sent.
Distribution Groups: These are Exchange Distribution Lists or Windows Distribution Groups that GOexchange has detected in the environment.
NOTE: Not all types of Notification support all types of recipient targets. For more details, see Event Definitions.
Optional: Use the "Filter" above the Recipients tree to limit what is displayed in the tree. There are three possible filter settings:
<Selected> shows only items that were previously selected. (It will also show Built-In groups that contain selected individuals.)
<Unselected> shows only items that haven't been previously selected. (It will also show selected Built-In groups that contain unselected individuals.)
"Substring". Type some text in the filter box to show only items whose name or e-mail address contains that text.
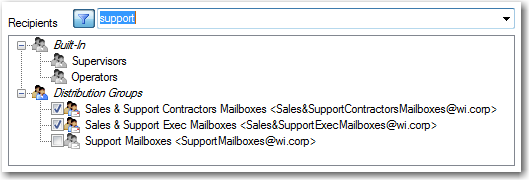
Click the "Filter" button ( ) to toggle filtering off.
If the selected template is for a Scheduled Notification, set the Delivery schedule. Here you say at what time before a job's scheduled execution should the notification be sent. You may specify multiple delivery times.
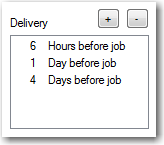
Use the "+" button to add a new delivery time.
Highlight a delivery time and click the "-" button to remove that time.
NOTE: The Delivery list will only be displayed if the notification's event type is one of the "Scheduled" events.
NOTE: Scheduled notifications and delivery times will only apply if the job is scheduled. When a job is run manually, these notifications will not be sent.
Proceed to: Custom Processes
Back to: How do I create a job?