How Do I Run the GOexchange Server under a Different Service Account?
During installation, the GOexchange Server agents are configured to run under a specified service account; by default, this will be GOexchange's GOSupervisor account, but a custom account may have been selected.
Post-installation you may find it necessary to change the service account, perhaps because company policies demand that the original account be disabled or that related services be consolidated to use a single account, or perhaps the account is staying the same, but you had to change the account's password. Changing the service account is also a valid troubleshooting step, if it is suspected that GOexchange's current service account is being denied access to a required resource.
When changing the service account, remember that any selected account must have the same rights and memberships of the default GOSupervisor account. The one exception to this would be if you were planning on running the services under Windows' "Local System" account; though be aware that under the "Local System" account, GOexchange may not be able to access remote resources, like Mapped Drives.
To change the service account via Windows' Services manager:
-
On the Exchange server, run "services.msc" to bring up the Services management console.
-
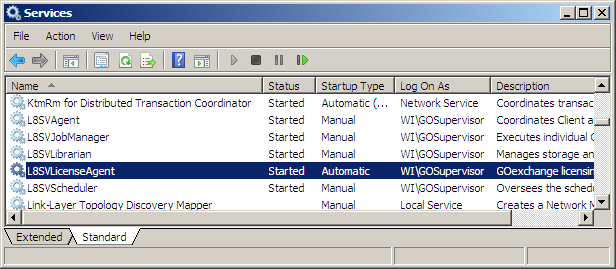
Scroll down to the services named "L8SV*". These are the GOexchange Server agents.
-
Right-click on L8SVLicenseAgent and select Stop. This will safely stop all of the GOexchange services.
-
Wait for all of the "L8SV*" services to stop. (You may hit F5 intermittently to refresh the view; when the Status column is blank for all of the services, the services will be stopped.)
-
Go through all of the "L8SV*" services, performing the following steps on each:
-
Right-click on the service and select Properties.
-
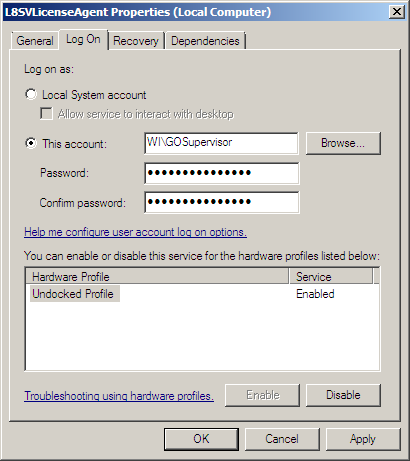
Go to the Log On tab.
-
Under Log on as:, either...
-
Select Local System account.
... or ...
-
-
-
Select This account.
-
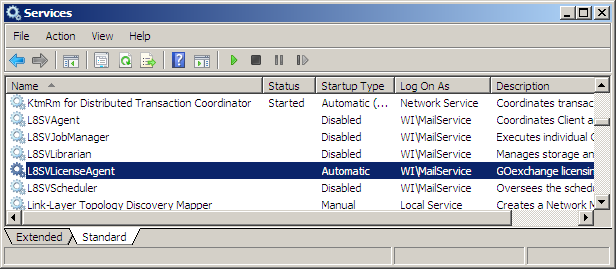
Enter the account name in the format "DOMAIN_NAME\ACCOUNT_NAME", e.g. "WI\MailService".
-
Type in the Password for the account, and then type it again in Confirm password.
-
Click OK.
-
When done, look at the Log On As column in the Services management console to confirm you've successfully updated all five "L8SV*" services.
-
Right-click on L8SVLicenseAgent and select Start. This will bring up all of the GOexchange Server agents.
To change the service account via the Command Line:
If you opted to install GOexchange's Support Tools and the Client Console on your Exchange server, then you may use GOexchange's L8ChAcc command to simplify this process.
-
On the Exchange server, run the GOexchange Client Console.
-
Select Help -> Support Tools -> Tools Shell. A command window opens to GOexchange's Agents directory.
-
Either...
Type... L8ChAcc -L ...and hit Enter.
-
-
-
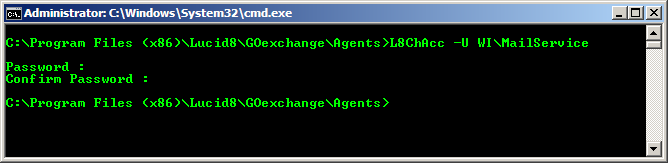
Type... L8ChAcc -U DOMAIN_NAME\ACCOUNT_NAME ...and hit Enter.
For Example:
L8ChAcc -U WI\MailService
-
When prompted, type in the account password and hit Enter. (The characters you type for the password will not appear on screen.)
-
When prompted, confirm the account password and hit Enter.
When run, L8ChAcc will:
-
Stop all of GOexchange's services.
-
Set all GOexchange services to use the indicated account and password.
-
Give the indicated account the "Log on as a service" right.
-
Start the GOexchange services.
Back to: General Questions