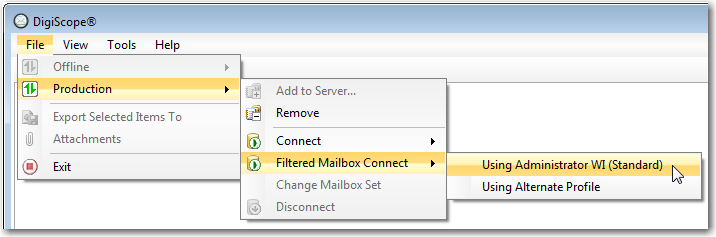
After adding the desired production source to the Production Tree, select the production source in the Production Tree and click File > Production > Filtered Mailbox Connect > Using Default Profile or Using Alternate Profile.
NOTE: If you experience problems connecting to an Production Database or Mailbox please review the Rights Required for Online Database & Mailbox Access. If you are specifically experiencing issues connecting to an Exchange 2007 server please see Unable to Connect to Production Exchange 2007 Server Mailboxes.
If you are logged in as a user that has been granted the Rights Required for Online Database & Mailbox Access then Filtered Mailbox Connect > Using Default Profile will be available. If the Filtered Mailbox Connect > Using Default Profile sub menu entry is grayed out this means that the currently logged on user has NOT been granted the Rights Required for Online Database & Mailbox Access and therefore you must create an impersonation profile by selecting Filtered Mailbox Connect > Using Alternate Profile.
NOTE: If you receive an error when connecting to a Production source, please try to connect with a different user’s profile using the Alternate Profile dialog.
Selecting Filtered Mailbox Connect > Using Alternate Profile will allow the user to create a new profile from a user that has been granted the Rights Required for Online Database & Mailbox Access.
NOTE: The currently logged on user must know the password for the selected profile in order to impersonate the user.
NOTE: These same connect options are presented in the context menus when you right-click on the database.
NOTE: You can change the mailboxes that are part of the filter by selecting Change Mailbox Set
Next, the Filtered Mailbox Mount dialog is displayed. The Filtered Mailbox Mount gives you many options for filtering which mailboxes will be connected to from your production source. Once the Filtered Mailbox List contains the mailboxes you wish to have connected, click the OK button to continue.
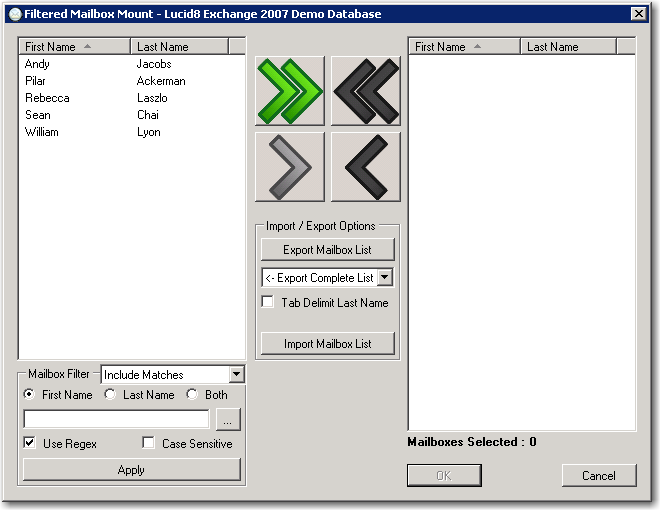
You can select individual mailboxes or multiple mailboxes from the left Mailbox List and use the arrow buttons to add the selected mailboxes to the right Filtered Mailbox List.

Use the green double-right arrow button to add all of the mailboxes listed on the left Mailbox List to the right Filtered Mailbox List.
Use the green single-right arrow button to add the currently selected mailboxes in the left Mailbox List to the right Filtered Mailbox List.
Use the red double-left arrow button to remove all of the mailboxes listed on the right Filtered Mailbox List.
Use the red single-left arrow button to remove the currently selected mailboxes in the right Filtered Mailbox List.
You can use the Mailbox Filter area to filter the left Mailbox List to make it easier to find the mailboxes you wish to add to the right Filtered Mailbox List.

Selecting Include Matches from the drop-down will include only mailboxes that match the applied filter
Selecting Exclude Matches from the drop-down will include only mailboxes that do NOT match the applied filter
You can choose to filter mailboxes based on the First Name, Last Name or Both by checking the appropriate option.
You can choose to filter mailboxes using a Regular Expression by checking the Use Regex option. This will give you the option to click the ellipse button to open the Regular Expression editor.
You can choose to have your filter expression be case sensitive by checking the Case Sensitive option.
Click the Apply button to apply the filter to the left Mailbox List.
If you wish to save a copy of your Filtered Mailbox List to import it next time you connect to a production source or if you need the list of mailboxes for some other use, you can use the Import / Export Options area to accomplish this.
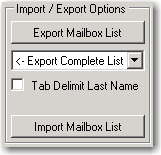
Select the <- Export Complete List option from the drop-down to export the complete unfiltered left Mailbox List.
Select the <- Export Displayed List option from the drop-down to export the currently displayed mailboxes listed in the left Mailbox List.
Select the Export Selected List -> option from the drop-down to export the mailboxes that are currently listed in the right Filtered Mailbox List.
You can check the Tab Delimit Last Name option if you would like the exported list to tab delimit the first and last names. If this option isn't checked, the first and last name will be delimited by a space.
Click the Export Mailbox List button to create an exported mailbox list based on your selected options.
Click the Import Mailbox List button to import a previously exported mailbox list. This will move all of the mailboxes in the exported mailbox list that are currently available to the Filtered Mailbox List.
Next, the following dialog is shown where you can follow the progress while DigiScope connects to the production source.
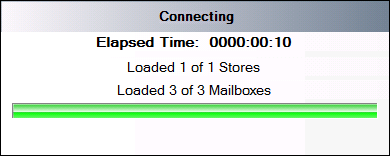
Once the mount process finishes, you can now Search, Recover, or Export your data from the production source using DigiScope.